
Key Takeaways
- Proper installation of bucket teeth ensures maximum penetration, fuel efficiency, and reduced equipment wear, especially critical for compact machines like mini excavators.
- Always use compatible replacement parts and the correct tools (hammer, pin, retainer) to guarantee a secure and flush fit.
- Regular maintenance—including cleaning, inspection, and prompt tooth replacement—prevents costly repairs and downtime.
- Match tooth design to ground conditions (e.g., standard, chisel, or tiger styles) for optimal digging performance and safety.
- Everstar Machinery offers expert support and a wide selection of ground-engaging tools, helping you choose the right solution for every application.
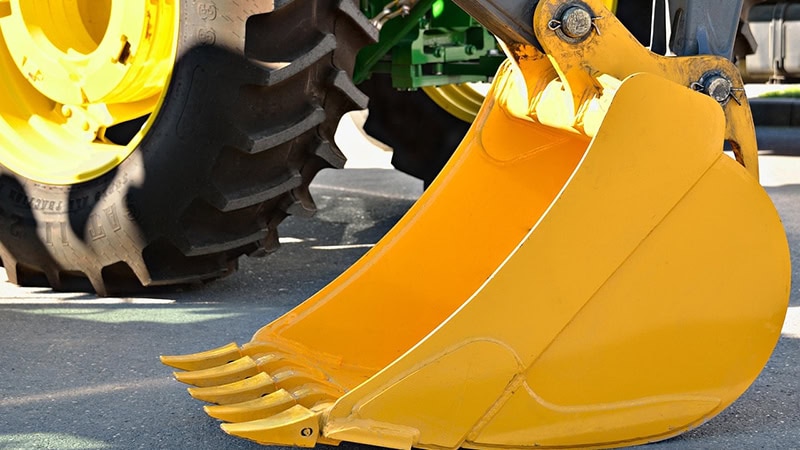
The performance of your compact equipment in foundation— especially mini excavators— depends heavily on the condition and installation of bucket teeth.
These small yet powerful components are critical ground-engaging tools that directly influence digging precision, machine stability, and overall project timelines. Improperly fitted or worn teeth can severely reduce breakout forces, slow progress, and escalate costs.
Whether you’re preparing for your next job or looking to extend the life of your buckets, knowing how to replace teeth correctly is essential.
This guide walks you through the proper steps for installing bucket teeth on a level surface, ensuring optimal performance and maximum penetration in diverse ground conditions.
We’ll also help you choose the right teeth for your machine and application, while understanding how tooth design impacts durability and function.
Why Correct Bucket Tooth Installation Matters
Proper installation of bucket teeth in drilling operations is more than a maintenance step— it’s a critical factor in maximizing machine performance and minimizing operational delays in small to mid-scale project environments.
When correctly installed, these parts ensure better ground penetration, which in turn reduces fuel consumption and operator fatigue. This is particularly important for compact machines and loaders, where every drop of fuel and hour of productivity counts.
Accurate installation also prevents uneven deterioration, which can lead to early replacements, damaged adapters, and even bucket failure. Over time, that means fewer costly repairs and improved contact with tough terrain.
By securing all high-friction components properly and ensuring a tight fit, you set up your machine for longer tool life and smoother operation.
For managing a rural trenching project or prepping an urban foundation, taking the time to install components correctly ensures your equipment is ready for operation action. This extra attention helps keep schedules on track and avoids unexpected delays.
Impact on Ground Engagement and Efficiency
Correct tooth alignment leads to smoother operation and cleaner cuts—essential when working in confined work areas. This precision reduces vibration, distributes contact forces evenly, and protects internal components from stress.
Depending on your bucket size, even minor misalignments can impact productivity. Keep surfaces clean, ensure all worn components are fully removed, and always gather the right parts before beginning.
If unsure, visit your equipment manual or contact a certified support team to ensure peak performance with every install.
Tools and Parts You’ll Need

A smooth and safe procedure demands the gathering of all necessary tools and safe gear at the beginning of the installation precess.
Begin with safety best practices and equipment such as gloves, goggles, and a sturdy hammer—you’ll need them to insert and secure components under force. A pry bar can also help when removing damaged components.
Next, gather your replacement parts, which include components suited for your machine type, along with matching adapters, retainer locks, and pin systems.
These components come in various shapes and sizes, depending on the bucket model, so confirm compatibility before installation.
Use a wire brush and degreaser to clean the contact surfaces and remove all residue and build-up from the bucket and adapters. A vertical tooth slot should be fully clear before inserting the new tooth.
To avoid misalignment and ensure maximum penetration, position the tooth correctly, slide it in place, and drive the pin through with a hammer. Secure the retainer tightly.
The right preparation prevents loose components and poor performance in challenging materials, such as rock or compact soil.
Choosing the Right Replacement Teeth
Not all high-impact components are created equal. Standard options offer balanced durability for general-purpose applications, while chisel-style components perform better in compacted soil. For working in rock, tiger-style profiles provide sharper penetration with less resistance.
To get optimal performance, match the tooth style to both your ground conditions and the tool design. Using the wrong tooth type can reduce productivity and accelerate component degradation.
Always check compatibility with your machine’s adapters and bucket specifications to ensure a reliable replacement operation.
Step-by-Step Installation: Replace Worn Teeth with Precision

Proper installation of components according to bucket size and capacity ensures your machine is always field-ready and performing at its best. Follow these steps carefully to minimize deterioration, enhance ground penetration, and avoid costly damage to your bucket or adapters.
Step 1 – Ensure Safety and Preparethe Work Area
Begin by parking your machine on a level surface and lowering the bucket to a stable position. Always use gloves and safety goggles to protect yourself from flying particles or tool slips.
Use a wire brush or cloth to clear the contact zone between the bucket and the adapter. Any remaining dirt or rust can prevent proper seating and long-term locking system retention.
Step 2 – Remove Old Teeth and Clean the Adapter
Use a punch or chisel along with an impact device to dislodge the existing locking element that secures the worn component. Some pins may be rusted or deformed, so a few firm strikes might be needed.
Once the worn parts are removed, thoroughly prepare the mounting surface. Look closely for signs of stress, cracks, or distortion—if damaged, the connection point should be replaced to prevent failure during operation in tough ground conditions.
Step 3 – Align New Bucket Tooth and Insert
Select the correct bucket teeth for your machine and the specific terrain you will be working in. Slide the new tooth onto the mounting point, making sure it fits snugly and seats completely. There should be no gap between the teeth and adapter, and alignment should be flush.
Misalignment can lead to vibration, reduced cutting performance, and accelerated component damage.
Step 4 – Secure with Locking Pin
Position the pin through the tooth and adapter, ensuring the holes align. Depending on your tooth system, this could be a roll pin, steel pin with a retainer, or another locking configuration. Tap it in using a suitable impact device until it’s fully seated and locked.
Test for movement—there should be none. A loose locking component can work free during operation, risking both the attachment and the machine.
By installing bucket components correctly, you maintain peak productivity, reduce maintenance costs, and ensure your equipment is always prepared for the next task.
Post-Installation Checks and Safety
Once the new bucket teeth are installed, it’s crucial to run a few final checks to ensure everything is secure and functioning properly. Start with a thorough visual inspection: look for any visible gaps between the teeth and adapter or signs of a loose pin. Each tooth should be flush and firmly seated.
Next, test the installation by performing a short dig in soft, low-resistance ground. This helps confirm that the bucket and its new teeth are operating correctly under load. Listen closely for any unusual rattling, clicking, or signs of slippage—these may indicate an improperly installed locking mechanism.
For safer results, follow the recommendations provided by OSHA for construction PPE. Also, keep the work area clear and monitor your machine’s performance closely during this initial trial.
When to Recheck After Initial Use
Even a perfectly installed system can shift slightly under real-world working conditions. This is why conducting a follow-up inspection after the initial 1–2 hours of use is important.
Recheck pin placement, teeth alignment, and retighten if necessary. This quick step prevents premature failure and extends the life of your digging components.
Maintenance Tips for Long-Term Performance

To get the most out of your bucket teeth, integrate routine maintenance into your workflow. After every use, scrub the bucket and teeth with a wire brush to remove soil, debris, and buildup. This helps prevent premature deterioration and reveals early signs of damage.
Perform a visual inspection to check for loose pins, cracks, or misalignment. Immediate replacement of worn or mismatched teeth avoids uneven wear and ensures consistent performance on every dig.
Always match your bucket teeth to the terrain. Compact soil may require chisel styles, while rock demands sharper, more aggressive shapes. Using the wrong teeth can reduce performance and risk equipment damage.
Scheduled inspections and timely part changes don’t just extend component life—they also reduce downtime and improve operator safety, keeping your projects on track.
Everstar Machinery’s Guidance
Our field team advises contractors using small and mid-size machinery to inspect bucket teeth weekly, especially after high-impact jobs.
Always install teeth with the correct torque and verify pin engagement after a few hours of digging.
When in doubt, contact Everstar for guidance—we’re here to help you keep your gear in top shape with safe, reliable practices.
FAQs- How to Install a Bucket teeth
When to replace bucket teeth?
Replace bucket teeth when you see visible damage, rounded edges, or reduced cutting efficiency during digging. If the teeth no longer cut into the ground effectively or look chipped or cracked, it’s time to replace them.
Ignoring worn teeth can increase stress on your bucket and machine parts, resulting in higher maintenance costs and reduced productivity.
How often should I replace bucket teeth?
Replacement frequency varies based on usage, ground conditions, and materials handled. Typically, contractors should inspect teeth weekly and plan for replacement every 200–400 operating hours.
Working in abrasive environments such as rock or compacted soil may require more frequent replacements. Regular inspections are crucial to prevent unexpected failures and ensure optimal performance.
Can I install bucket teeth on my mini excavator by myself?
Yes, installing bucket components on compact machinery is a straightforward process with basic tools. As long as you follow safety procedures—securing the machine, clearing the area, and properly using a hammer and pin—you can complete the task solo.
Ensure you are using compatible replacement teeth and retainers for your machine’s bucket size.
What tools are required to remove worn bucket teeth?
You will need an impact tool such as a mallet, punch, or chisel, safety gear, and possibly a pry bar. A wire brush helps prepare the adapter area before installing new teeth. These basic tools allow you to dislodge the existing pin, remove the worn teeth, and prepare the bucket for new parts.
What’s the safest way to hammer in the locking pin?
Secure the bucket on a level surface before inserting the pin. Use one hand to steady the pin and the other to firmly drive it in with a hammer. Use safety goggles and gloves to protect yourself from flying debris or metal shards. Make sure the pin is fully engaged and check for any movement after installation.
Can I add teeth to my skid steer bucket?
Yes, most skid steer buckets can be upgraded with bolt-on or weld-on teeth, improving cutting power and performance in tough ground conditions.
Make sure to choose the correct tooth design and pin system that matches your bucket type. Follow similar installation steps to those used for compact earthmoving machines.
How to install auger teeth?
To install auger teeth, secure the auger, use a punch or similar device to remove old components, then insert the new ones. Align them correctly for optimal penetration and ensure they’re seated firmly.
Use the correct pin or bolt system to secure the teeth. Regular inspection helps prevent premature damage and auger imbalance during drilling.
Conclusion: Maximize Equipment Performance
Proper installation of bucket components isn’t just about completing the task—it’s about doing it safely, efficiently, and without avoidable interruptions to reduce labor costs in construction.
Small details like a tight fit, debris-free adapter surfaces, and precise alignment can significantly extend component life and improve performance, especially on compact work sites.
Regular inspection and proactive maintenance should be part of every operator’s routine. This not only reduces unexpected failures but also keeps your equipment working at peak productivity.
At Evestar Machinery, we provide the reliable parts and practical guidance you need to get the most out of every bucket. Our products are designed for real-world jobsite demands.
Get the Right Ground Tools for the Job
Explore our full catalog of bucket teeth solutions to ensure a perfect match for your equipment.
Need help choosing the ideal setup? Contact our specialists for personalized guidance based on your machine type and project conditions.
